There are many types of fan controllers. The most frequent and simplest is the wall switch. When a wall control cannot be installed, a remote control is occasionally available as an add-on. Some ceiling fans, such as conventional and classical designs, include a draw chain that hangs down. While most ceiling fans are remote control adaptable, which means that a remote may be added if desired, there are some fans that do not come with a remote and cannot be placed with a switch (i.e. remote only).
- Pull cord
- Remote control
- Wall controller
- Without control unit
- Reversing switch
Ceiling Fans With Pull Cord
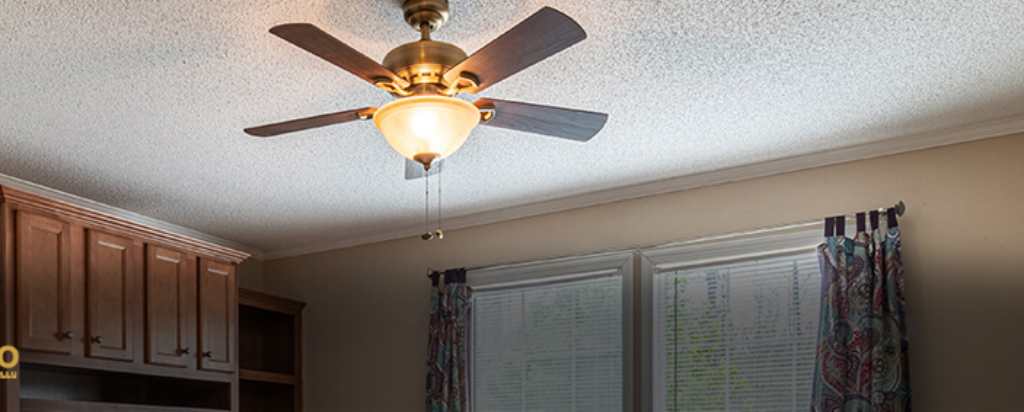
The integrated pull cord is used to turn on and off the ceiling fans, as well as to regulate the fan speeds. A second pull cable is used to regulate the lighting (if the fan has one). This strategy has been tried and true for many years and is a popular choice even today. Pull cords offer an authentic touch to the fan, which is ideal for antique-style equipment. The majority of cables have a stylish metal locket or wooden piece at the bottom that consumers will pull on.
A ceiling fan with pull cords is operated by hand. This type of fan can also be used in rooms with high ceilings by installing an extension chain. Pull cords have one advantage over remote controls: they cannot be misplaced. In the event of damage, the chains are simply replaced and, more significantly, they are inexpensive. If necessary, a remote control or wall controller can be added to the fan via a pull cable.
Ceiling Fans with Remote Control
Ceiling fans with radio remote controls make life easier. The rotation speed, running speed, and light kit may all be controlled manually. Simply change the airflow from the comfort of your favourite chair.
A remote control set is made up of two parts: The radio signal is sent by the transmitter. It is battery-powered and is held in one’s hand (“visible” component of the remote control kit). The signal is sent to the motor by the receiver device. The receiver is either directly beneath the fan’s ceiling mount or inside the fan housing. When you leave the room, you can store the handset on a wall bracket. This ensures that the remote control is always found in the same location and cannot be misplaced.
On the remote control, different codings can be entered and utilised for up to 16 fans. The devices can be used in conjunction with a single transmitter. This provides huge time savings for large sectors like restaurants or storage facilities.
To avoid any overlapping of radio frequencies with other devices, such as a stereo system, the frequencies on the remote kit can be manually changed. As a precaution, the electrical supply to the ceiling fan should be disconnected at the fuse box. There are four tiny DIP switches in the transmitter’s battery compartment. They can be set to any combination by hand or with a screwdriver if the switches are too difficult to reach. The same options are entered into the remote control receiver.
The standard radio remote control works not only with the same brand but also with Westinghouse and Hunter ceiling fans. The “universal” type is designed to work with nearly all of the most popular ceiling fan brands. Both remotes have three rotation speeds as well as light dimming (just on/off for low-energy bulbs). After your fan with remote control is installed, your conventional light switch can remain in place and continue to function normally. Remote controllers are also appropriate for fans that do not have lights and fans that have energy-saving lighting. Not all energy-saving bulbs can be dimmed. If the feature is available, as in the case of the DC fan, the technical specifications explain the function explicitly.
Fans powered by direct current motors can rotate at up to six different speeds. They are not given one of the standard remotes, but rather a customised remote kit that is compatible with DC technology. Some of the designer ceiling fans, for example, make use of a stylish infrared transmitter. It regulates the fan speed, colour temperature, and light intensity, as well as the fan’s running direction.
Ceiling Fans with Wall Controller
Using fans with a wall controller is simple and secure. The rotation speed and, if applicable, lights are controlled using a normal light switch. The rotation speed is adjustable in four steps with no buzzing sounds.
Ceiling fan wall controllers are fitted in place of standard light switches, even if the fan itself does not contain a light kit. For fans without light fittings, select the suitable wall controller without light. If you have a fan with lights, pair it with the light-up wall controller. You can also select the latter if you intend to add a light kit to your fan at a later date. The installation of both controller units differs only slightly.
Installation Wall Controller without Light
A conductor and a neutral wire are located behind your standard light switch. Connect these cables to the entry points on the back of the new wall controller after disconnecting them from the light switch. Screws secure the cables in their locations. The new controller has now been bolted into the opening in the wall.
Installation Wall Controller with Light
Two conductors and one neutral wire are required. The previous light switch has been removed. All power supply, light, and fan apertures on the new controller unit are clearly labelled. Insert and secure each cable properly. Your new wall controller already has the screws inserted.
Our wall controllers are appropriate for fans with a maximum motor wattage of 150W and lighting with a maximum value of 400 Watts. The entire housing and front cover are constructed of strong white plastic. The controller is a quiet, inconspicuous addition to the wall that is also simple to clean.
Surface-mounted wall controllers are wall-mounted. This method is straightforward and simple to implement. The controllers are flush-mounted and plastered into the wall. They can also be inserted into ordinary existing in-wall sockets (single). Flush-mounted controllers are less noticeable than on-wall ones. If a house is being built, their installation is recommended during the early stages of construction.
Most ceiling fans cannot be used in conjunction with a wall controller and remote control. They can only operate one of the units.
If you already have a programmable remote control or similar control device, choose one of our options without a controller. Otherwise, an additional control unit must be ordered. Alternatively, you may just choose a bundle that includes your desired type of control.
Manual Reversing Switch on the Fan
If the remote control does not have this feature, the ceiling fan’s running direction can be altered manually using a slide switch on the housing. You have the option of selecting a summer or winter scene (forward and reverse function). The fan moves air and provides pleasant cooling in the summer. In the winter, the ceiling fan will recirculate heat until cold spots on the floor are eliminated and the indoor temperature is uniform. The ability to vary the fan’s running direction is a key feature that contributes to lower heating expenses.
The reverse switch does not control the fan’s start-up, lights, or spinning speed. One of the control units is in charge of these aspects.
Conclusion
Add up to six fan speeds and a light kit with dimmable lighting to the mix. A fan’s functionality can be controlled in a variety of ways. Ceiling fans from The Fan Studio ranges can run in either direction, depending on the model.


